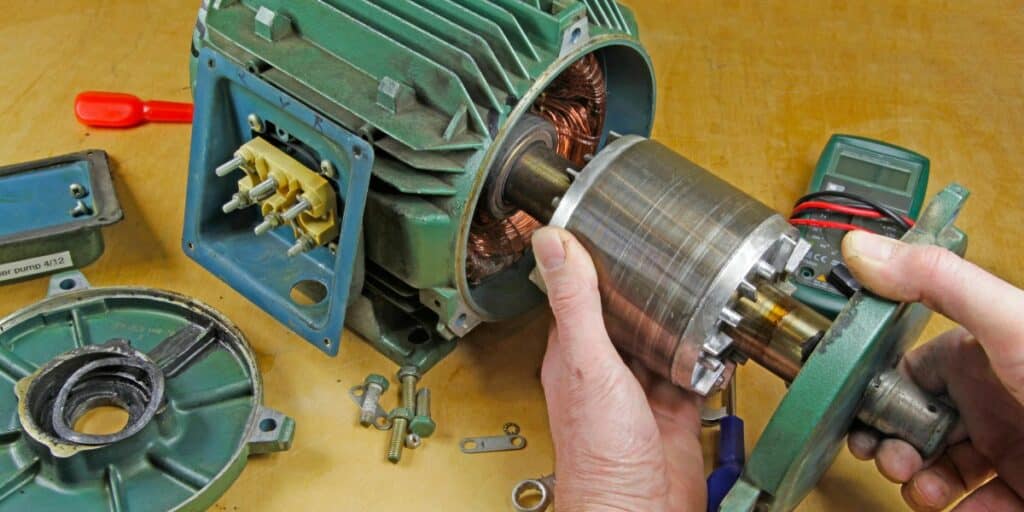
The squirrel cage motor is a three-phase asynchronous motor with rotor windings. This rotor’s cylindrical core is made of steel laminations and is covered on all sides by a layer of highly conductive metal. The two main types of squirrel cage induction motor failure are mechanical and electromagnetic. The following article will guide you on how to test a squirrel cage motor.
When an alternating current flows through the stator windings of the generator, it makes a magnetic field that spins. Because of this, the winding on the rotor makes its own magnetic field.
Squirrel cage motors have speed-torque characteristics that are easy to change, which is a big plus for these motors. The shape of the bars that make up the rotor needs to be changed.

Electric motors that are important to the plant’s operation must be kept in good shape to avoid costly plant shutdowns and keep production at its highest level. In addition to the required maintenance, squirrel cage motors must be tested and checked regularly.
What is the most common failure of the squirrel cage induction motor?
The mechanical failure of a squirrel cage motor is usually caused by the clearance of electronic parts like bearings, rotor shafts, end caps, and other bad working conditions. Symptoms include the motor getting hot, the current going up a lot, strange noises, the rotor jamming, and other problems.
The most common reason for this failure is that the motor wasn’t installed and maintained properly. The solution is to follow the instructions for installation and use in the assembly manual.
On the other side, the electromagnetic faults of a squirrel cage induction motor are more complex and varied. The most common ones are:
1. Winding grounding
When moisture or an outside force damages the motor stator winding, the insulation value of the winding, stator core, and rotor insulation material is greatly reduced or even goes to zero. This means the motor case can’t start normally; the machine temperature increases or even burns out.
The way to find out is to use a megohmmeter to test the DC resistance of each winding of the motor to the ground. If the resistance value is too low, the motor winding is damp. If the resistance value equals zero, the motor winding has been completely grounded.
The solution is to test the insulation resistance before turning on the motor and then test again to see if the motor is working normally and well.
2. Short circuit fault
It can be broken into a phase-to-phase short circuit, a turn-to-turn short circuit, and a phase-to-group short circuit.
1. Short circuit between the phases
When moisture or an outside force damages the motor stator winding, the insulation value of the winding, stator core, and rotor insulation materials is greatly reduced or even goes to zero. This means the motor case can’t start normally, and the machine heats up or burns out. Use a megohmmeter to test the DC resistance of each winding of the motor. If the resistance is too low, the winding is damp; if the resistance is equal to zero, the winding is completely grounded.
2. Short circuit between turns
The insulation on the motor wire is broken, which causes a short circuit that happens when two wires touch each other. If the motor has a short circuit between turns, there will be electromagnetic noise, the winding will heat up, and there may even be smoke and a smell of burning.
The way to find out is to use a multimeter resistance or bridge to check the DC organization of each phase winding.
If it is lower than the specified value, open the end cover to check the winding to find the fault point. If the damage isn’t too bad, insulation material can be used to fix it. If the short circuit is too bad and has burned the coil, the wires need to be re-embedded.
3. Short circuit between poles
The solution is to reset the winding after heating and softening it. This is mostly because the insulation sleeve of the winding connection line is not well set.
3. Breakage fault
It usually happens at the motor winding terminals or at the lead wire’s end. This is caused by bad welding, corrosive flux that hasn’t been cleaned up, and pressure on the winding.
4. Loss of phase
It means that the three-phase asynchronous motor is running with one-phase winding not working. When two-phase voltage can’t start the motor, which often happens when the motor is running, the motor will burn up quickly because of the heat, and the power fuse will blow.
There are many reasons for this, such as a bad switch contact, too little pressure on the contactor, a short circuit in one phase of the power line, etc. If the problem is with the power supply and fuse, use a multimeter to test, open the end cover, find the problem, re-weld, and wrap the dipping paint to dry. If the problem is with the winding, replace the winding.
5. Overload operation
When a motor runs too fast, it makes a dull sound, slows down, the temperature rises clearly, the current goes up a lot, etc. The wrong way the motor and load are set up causes the motor to overload. The solution is to avoid overloading the operation by setting up a reasonable configuration based on how well the motor works and how the reload works.
Squirrel Cage Motor Inspections
Squirrel cage motors are vital in various electrical applications, and their maintenance is key to ensuring reliability and efficiency. Regular testing and inspections of these motors can help identify potential issues before they escalate into major problems. This guide covers the essentials of squirrel cage motor testing and inspections, offering insights into effectively maintaining and troubleshooting these motors.
Understanding Squirrel Cage Motor Housing
The first step in testing a squirrel cage motor is understanding the type of motor housing used. The housing design can impact your ability to inspect internal components:
- External Inspection: If the internal parts of the motor are not accessible, start with a thorough external inspection. Look for wear, missing parts, or any visible damage that might affect the motor’s performance.
Using Borescopes for Internal Inspection
For a more in-depth analysis, especially when dealing with hard-to-reach areas:
- Borescope Utilization: Employ a borescope equipped with mirrors and extension rods to examine internal components like the rotor and the space between the stator core and the frame. This tool is invaluable for accessing and inspecting areas that are not visible externally.
Identifying and Addressing Motor Issues
Conduct a comprehensive check for any signs of damage or flaws:
- Damage Assessment: Look for damage indicators, such as cracks, breaks, or deformities in the motor components.
- Cleaning and Immediate Repairs: Clean any spills or dirt that could harm the motor’s operation. Address and rectify any issues that require immediate attention to prevent further damage.
- Scheduling Non-Essential Maintenance: Plan less critical repairs or maintenance during the motor’s next scheduled downtime to minimize operational disruption.
Squirrel Cage Motor Troubleshooting Tips
Understanding how to troubleshoot a squirrel cage motor is crucial for maintaining its longevity and performance:
- Reliability Enhancement: By learning and implementing effective testing methods, you can significantly improve the motor’s reliability and operational life.
- Cost Reduction: Regular testing and proactive maintenance can save costs by preventing unexpected breakdowns and expensive repairs.
Effective testing and maintenance of squirrel cage motors are essential for ensuring their optimal performance and longevity. By conducting regular inspections, using the right tools for internal assessments, and addressing any issues promptly, you can enhance the reliability of these motors and reduce operational costs. Remember, investing time in learning and applying these maintenance techniques is a proactive step toward achieving efficient and cost-effective motor management.

