Replacing Lid Lock On Maytag Washer
There’s a quiet satisfaction in fixing something yourself, especially when that thing is the trusty workhorse of your laundry room. Your Maytag washer has likely survived countless muddy soccer uniforms, bleach spills, and the great towel shortage of 2023. When the lid lock finally gives up, it’s not just an inconvenience—it’s a declaration of independence that you’re ready to answer with a screwdriver.
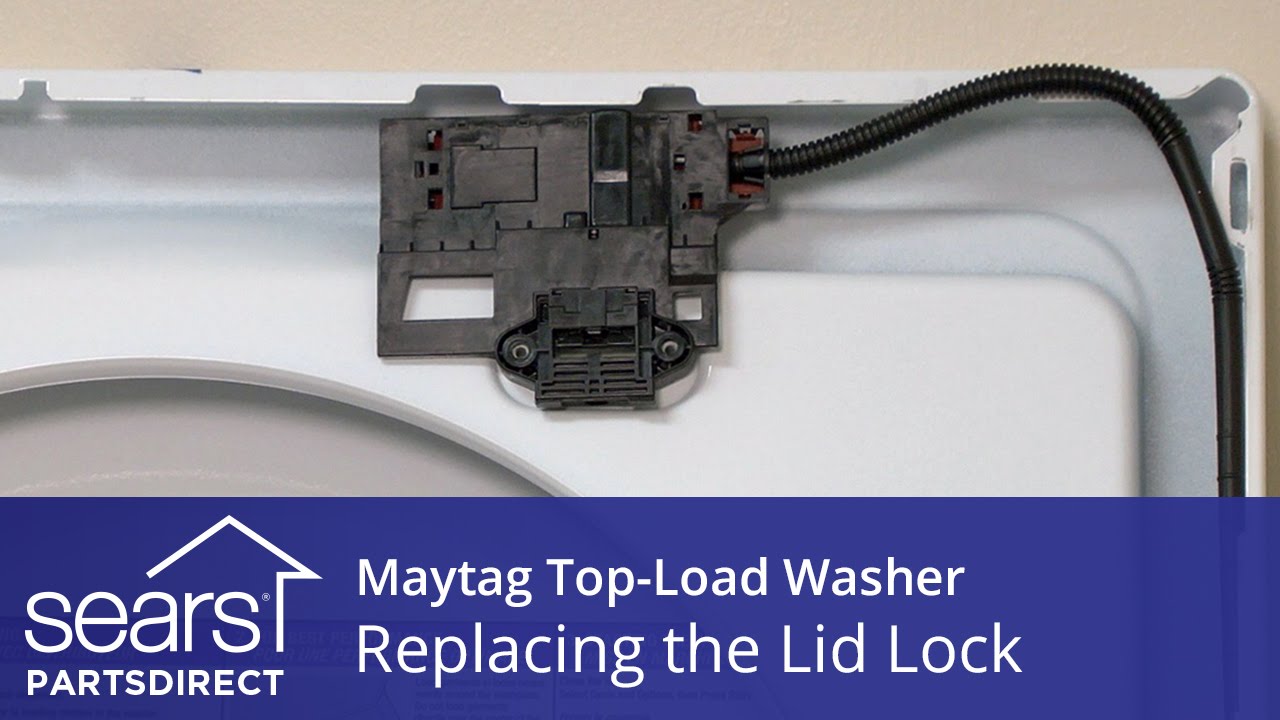
Replacing the lid lock is about more than just saving a repair bill. It restores the rhythm of your day, letting you toss in a load and walk away without fear of a mid-cycle halt. The purpose is simple: this small plastic-and-wire part keeps the machine from spinning with an open lid, protecting both your fingers and your floor from a watery catastrophe.
Everyday life gets a huge boost when you master this swap. You no longer wait for a technician’s “four-hour window” or pay a hundred bucks for five minutes of work. For anyone who runs a busy household, this skill transforms you from a passive consumer into an active problem-solver, ready to tackle the next squeak or rattle with confidence.
Common scenarios where this fix shines include the machine that beeps but never starts, or the washer that finishes a cycle but traps your wet clothes behind a stubborn door. Even intermittent errors—like a wash that pauses randomly—often trace back to a worn-out lock. You’ll see this issue most on front-loaders and high-efficiency top-loaders, where the lid must seal tightly for the spin cycle to reach full speed.
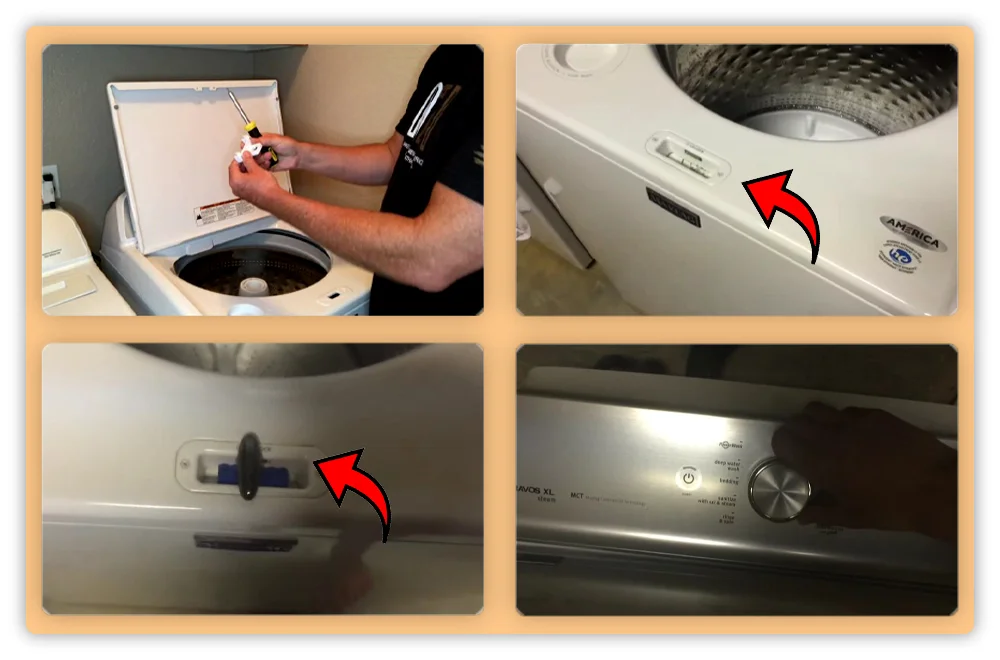
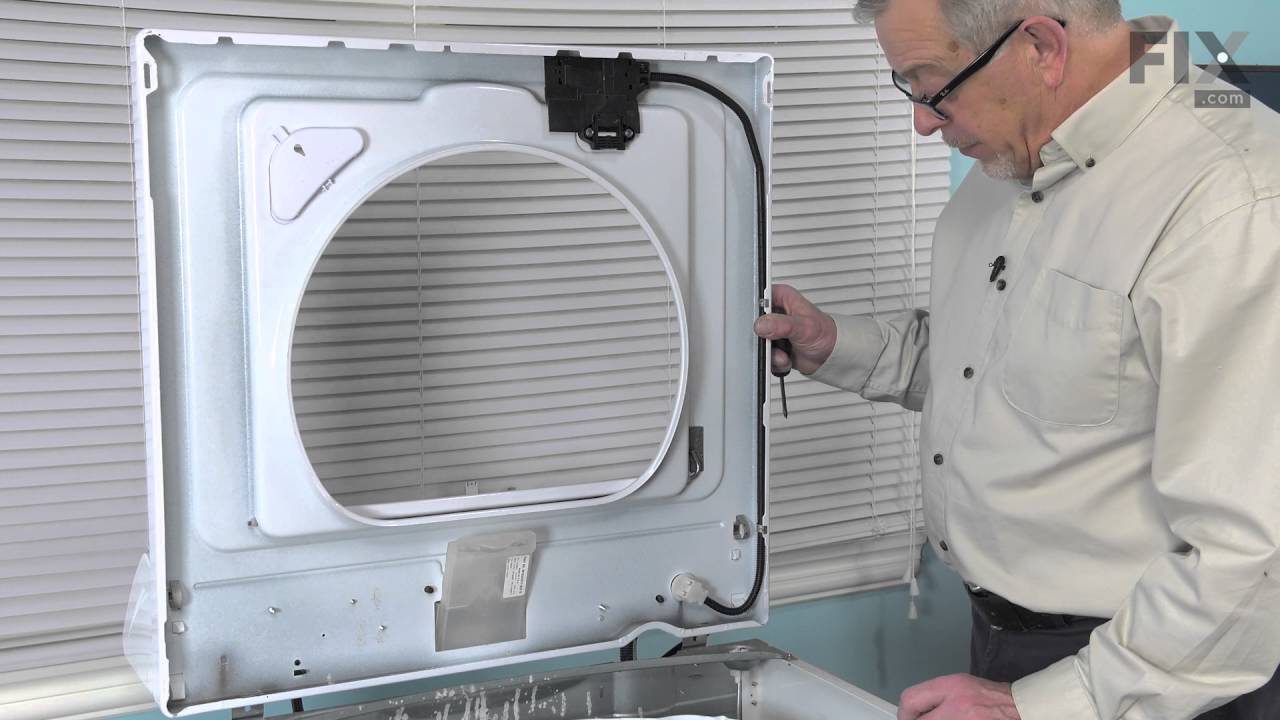
Before you begin, unplug the washer and keep a towel handy; there’s often a splash of water lurking under the top panel. Use a putty knife to pop the front clips, then tilt the top back gently—don’t force it, or you’ll snap the hinge. The lock itself is usually held by two or three screws, and the connector plugs out like a stubborn Lego piece.

A pro tip: take a photo with your phone before you disconnect the wire harness. This simple step saves you from a frustrating puzzle when you’re putting the new part in, especially if you’re not naturally “wired” for electronics. Also, buy the exact OEM part number from a trusted parts site—aftermarket knock-offs can save a buck but often fail within months.
Once installed, run an empty “Rinse & Spin” cycle to test the lock before you load a full hamper. You’ll hear a satisfying thunk as the lid engages, and that sound is pure gold. If the new lock still flashes an error, check the wiring harness for a loose pin—this happens more often than you’d think, and a firm push usually solves it.

The real joy here is that you’ve also learned a transferable skill. That same patience and careful attention will help you replace a dryer belt, fix a dishwasher latch, or even silence a squeaky garage door. Each small repair builds a mental library of “I can handle this,” which is far more valuable than the thirty bucks you saved on labor.
So, next time your Maytag throws a tantrum, don’t dread the hashtag. Embrace it with a cold drink, a clean workspace, and a healthy respect for the machine that keeps your family in fresh clothes. You’ll finish the job feeling capable, thrifty, and oddly proud—and that’s a spin cycle worth celebrating.