
How To Clean A Black Widow Keyboard

There is a particular kind of intimacy that develops between a gamer and their keyboard, and for owners of the Razer BlackWidow, that intimacy is often forged in the heat of virtual battle, punctuated by the crisp, tactile clack of mechanical switches. Yet, like any great relationship, neglect breeds decay. The BlackWidow, with its iconic green Razer switches and aggressive aesthetic, is not merely a peripheral; it is a totem of digital identity, a cockpit for countless digital adventures. But beneath that aluminum top plate and beneath those keycaps lies a dark, unspoken truth: a gritty ecosystem of dead skin, stale Cheeto dust, cat hair, and the desiccated remains of late-night snacks. Cleaning it is not just about hygiene; it is an act of reverence, a ritual of restoration that every devoted owner must eventually face.
The history of the BlackWidow is steeped in gaming lore, emerging from the 2010 era when mechanical keyboards were transitioning from office relics to esports essentials. Razer capitalized on this shift, offering a keyboard that felt like an extension of the player’s nervous system. Today, with models ranging from the clicky V3 to the linear V4, the internal complexity has grown, but the fundamental issue remains: dust is the eternal nemesis. In an age where we spend hours, even days, glued to our desks, the keyboard becomes a biological repository. Ignoring its grime is not just an aesthetic faux pas; it’s a functional crime that can lead to sticky keys, erratic double-clicks, and a subtle, unpleasant odor that undermines the sanctity of your gaming lair.
The Anatomy of Grime: Understanding Your Enemy
To clean a BlackWidow effectively, you must first understand the physics of filth. The mechanical switch stems—those cross-shaped pillars that the keycaps attach to—are particularly vulnerable. They act as tiny chimneys, funneling particles down into the delicate contact points inside the switch housing. This is where the real damage occurs. A single grain of sand or a microscopic shard of potato chip can cause the infamous “double-click” issue, where a single press registers twice, sending your character into a botched reload or a failed jump. The psychological impact is profound; a faulty key can induce a level of rage that supersedes any in-game boss battle, creating a sense of betrayal from a tool you once trusted implicitly.
Must Read
Culturally, the dirty keyboard has become a meme and a rite of passage. Forum threads are filled with “gore” photos of horrifyingly cluttered keyboards, with comments ranging from disgust to grim appreciation. There is a strange voyeuristic thrill in seeing the crusty evidence of another person’s intense gaming sessions. This shared experience unites the community—we all know the shame of flipping our keyboard upside down and watching a snowfall of debris scatter across the desk. Psychologically, the act of cleaning can be seen as a form of control. When your digital life feels chaotic, restoring physical order to your primary input device provides a zen-like satisfaction. It is a tactile meditation that reclaims your space and your performance.
Furthermore, the materials matter. Razer’s keycaps, particularly the ABS plastic ones, are notoriously porous and prone to developing a shiny, greasy sheen over time due to the oils from your fingers. This isn't just dirt; it's a chemical reaction with the plastic itself. The aluminum top plate, while sturdy, also shows fingerprints and smudges that can make your high-end keyboard look like a salvage find. Understanding that your skin’s pH level and sweat composition directly interact with these components elevates cleaning from a chore to a science. It’s a forensic investigation of your own daily habits, revealing what you eat, whether you smoke, and how stressed you are (stress-induced sweating equals more grime).
The Ritual: A Step-by-Step Descent into Cleanliness
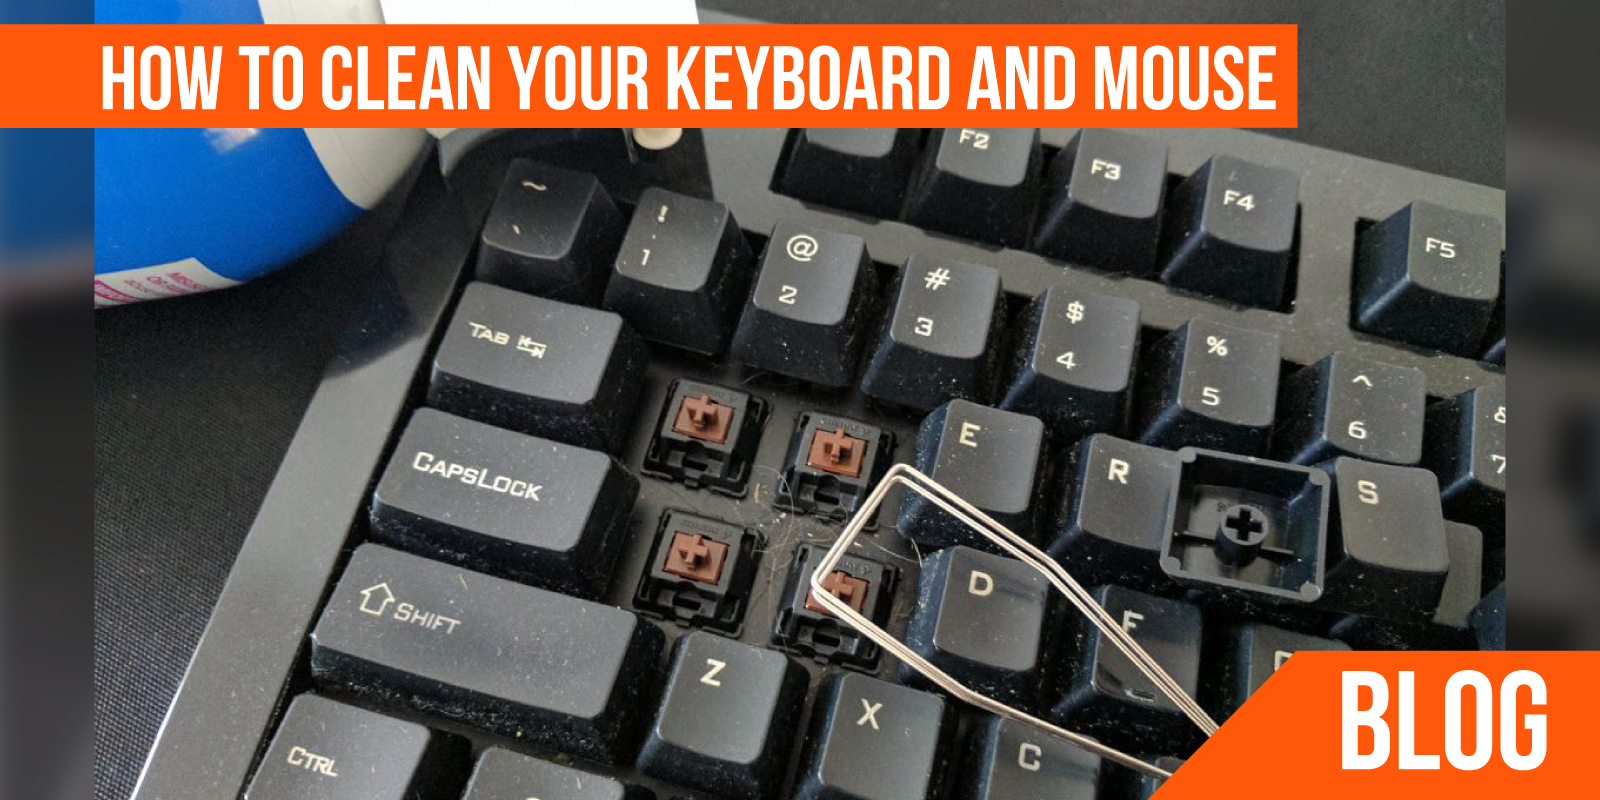
Imagine this: you are a digital archaeologist, about to excavate layers of history. Start by disconnecting the keyboard and taking it to a well-lit area, preferably over a trash can or sink. Do not skip this step. The first move is to remove all the keycaps. Using a wire keycap puller (never a flathead screwdriver, which will scratch the plastic), gently wiggle and lift each cap. For a full-size BlackWidow, that’s over 100 keycaps. Sort them into a bowl of warm, soapy water (use a mild dish soap, never harsh chemicals) and let them soak while you address the base. This is a patient person’s game; rushing this step leads to bent stems and broken clips.

While the caps soak, you face the main board. Do not use a vacuum cleaner, as the static electricity can fry the circuit board. Instead, use a can of compressed air or, better yet, an electric air blower. Tilt the keyboard at various angles and blast air between the switches. You will be horrified and amused by the cloud of dust that emerges. For stubborn grime lodged around the switch stems, use a soft-bristled brush (a clean makeup brush or paintbrush works wonders) to dislodge particles. If you encounter sticky residue from spilled soda, dip a cotton swab in isopropyl alcohol (at least 90%) and carefully dab the area around the switch. Alcohol evaporates quickly and won’t damage the PCB, but be cautious not to flood the switch mechanism.
Consider the scenario of a coffee spill. This is the most common and most tragic event in a keyboard’s life. If that happens, immediate action is critical. Unplug the keyboard immediately, flip it upside down to drain the liquid, and let it dry for 48 hours before attempting to power it on. In many cases, the BlackWidow survives, but the stickiness remains. In this case, you may need to unscrew the backplate (warranty void warning!) to access the PCB and thoroughly clean the contact pads with contact cleaner. A smart owner will invest in a switch puller and replace any switches that are beyond saving, ensuring the keyboard's longevity.
Now, back to the keycaps. After soaking, rinse them thoroughly and lay them out on a towel to dry. Patience is key here; water trapped inside the keycaps can cause corrosion in the switches over time. While waiting, use a microfiber cloth slightly dampened with a disinfectant wipe to clean the keyboard’s housing and aluminum plate. For the ultimate case study: YouTubers who review “beat up” keyboards often show before-and-after transformations that are nothing short of miraculous. The takeaway is that a two-hour investment can extend the life of your keyboard by years, saving you $150+ and preserving your muscle memory. Treat this not as a chore, but as a bi-annual maintenance appointment for your most important digital appendage.
The Q&A: Your Burning Questions, Answered
Can I use a dishwasher or washing machine to clean my BlackWidow keycaps?
Absolutely not. While the plastic is durable, the high heat and aggressive tumbling in a dishwasher will warp the keycaps, bending their stems and ruining their functionality. The keycaps are precision-molded, and even a slight distortion will cause them to feel “mushy” or to scrape against the switch housing. Similarly, a washing machine is a terrible idea; the impact against the drum will chafe the surface, removing the laser-etched legends and leaving your keys blank and unreadable. Stick to hand-washing with lukewarm water and gentle soap. This allows you to control the agitation and prevents any thermal damage.

But what about the keyboard itself? Putting a whole keyboard in the dishwasher is a death sentence. The water will seep into the switches, short-circuit the PCB, and cause irreversible oxidation. The only water-free method is using a specialized keyboard cleaning gel or a UV light sanitizer, but these only address surface contaminants. For deep cleaning, the manual method of keycap removal and air blasting is the only safe, effective route. Remember, your BlackWidow is a precision instrument, not a dinner plate.
How often should I perform a deep clean on my BlackWidow keyboard?
Frequency depends entirely on your environment and habits. If you eat at your desk regularly, have pets that shed, or live in a dusty city apartment, you should do a deep clean (keycap removal and air blasting) every three to four months. A quick surface wipe-down with a microfiber cloth should be done weekly to prevent the buildup of oils and fingerprints. If you are a very clean eater and use a wrist rest with a protective film, you might stretch it to every six months, but this is the absolute maximum. Ignoring the keyboard for a year will lead to “sticky switch syndrome,” where the lubricant inside the switches mixes with dust to form a gritty paste that dampens the clicking sound and feel.
Another indicator of when it’s time is the sound. A clean mechanical keyboard has a tight, crisp “clack.” A dirty one sounds dull, thuddy, or even rattly. If you notice inconsistent keypress resistance or a key that feels “gritty” when pressed, that’s a red flag. Listen to your keyboard; it communicates its health through its acoustics. Consider shifting your cleaning schedule around your gaming calendar—for example, after a major tournament or a long seasonal grind, treat yourself to a cleaning session as a form of cool-down and closure.
Isopropyl alcohol is safe on the switches, right? What strength should I use?
Isopropyl alcohol is generally safe for the electrical components of the keyboard, but the concentration matters. You should always use 90% or higher strength. Lower concentrations (like 70%) contain more water, which leaves a residue and increases the risk of corrosion if it gets trapped under a switch. The high-percentage alcohol evaporates incredibly quickly, minimizing the risk of damage. However, it is not safe for the keycaps themselves. Alcohol can strip the UV coating and the printed legends, leaving them faded and sticky-looking. Keep alcohol away from ABS plastic keycaps; use soapy water for those.

When applying alcohol to the switch stems, do not pour it directly. Dip a cotton swab or a pointed precision applicator into the alcohol, squeeze out any excess, and then gently swab around the gap between the switch housing and the stem. The goal is to dissolve the grime without flooding the mechanism. If you have a hot-swappable BlackWidow (like the V4), and a switch is severely sticky, it is far better to remove that switch entirely with a switch puller and clean it separately. This prevents any liquid from penetrating the PCB and causing future issues.
My spacebar is rattly and feels loose. Is that a cleaning issue or a mechanical failure?
Ah, the classic spacebar rattle. This is rarely a cleaning issue, but it can be exacerbated by dirt. The BlackWidow, like many mechanical keyboards, uses a stabilizer bar that runs horizontally underneath the spacebar. Over time, the lubrication on this bar can dry out or collect dust, causing a metallic rattle. First, clean the area thoroughly, removing any debris. If the rattle persists, you may need to re-lubricate the stabilizer. While you have the spacebar off, observe the wire and the plastic clips holding it. Applying a very small amount of silicone grease (or dielectric grease) to the contact points can silence the rattle dramatically.
Note that the spacebar also has a tendency to warp on some ABS models due to heat and pressure, creating a “tilted” feel. If the rattle is accompanied by a clicking noise on one side, it might be that the stabilizer clip has broken. Cleaning won’t fix a broken clip; you will need to purchase replacement stabilizer clips or a new spacebar keycap. This is easy to source online, but always check the specific BlackWidow model number to ensure compatibility. Remember, a rattle is a sign of wear, not necessarily a hygiene issue—even a pristine keyboard can rattle if the factory lubrication was thin.
Do I really need a keycap puller, or can I just use my fingers?
Using your fingers is a terrible idea. The force required to pull a keycap directly off is high, and when it finally gives, your hand will jerk upward, potentially snapping the switch stem or bending the metal stabilizer wire. Fingernails can also scratch the plastic. A wire keycap puller is inexpensive, costing less than $5, and it pulls the keycap straight up with even pressure, mitigating risk. The BlackWidow’s keycaps are fitted snugly; trying to pry them off with a knife or screwdriver will almost certainly leave ugly gouges in the aluminum top plate.

If you are in a pinch and don’t have a puller, use two bent paperclips inserted into the two small gaps at the top and bottom of the keycap (diagonal corners for larger keys). The key is uniform pulling, not leveraging. The physical act of destroying a keycap or a switch is one of those rage-inducing moments that feels catastrophic. Investing in a proper tool is a statement of intent: you care about your gear, and you respect the mechanical engineering within. It also makes the cleaning process significantly faster, turning a 30-minute extraction session into a 5-minute one.
In the grand tapestry of our digital existence, the keyboard is the physical bridge between your will and the virtual world. Cleaning it is a whisper to yourself that you value your tools and your craft. It is a micro-ritual that resets both the hardware and your personal workspace, offering a blank slate for future victories. When you finally finish, snap those clean keycaps back into place, and run your fingers across the uniform, crisp surface, there is a profound feeling of renewal—a dopamine hit akin to peeling the plastic off a new phone.
This act also reveals something about our human nature: our propensity for resource management. We are creatures who thrive on efficiency, and a dirty keyboard is inefficient. It slows our reactions, breeds bacteria, and degrades our focus. By maintaining our gear, we are asserting a small measure of control in a world that is increasingly chaotic and unpredictable. The keyboard doesn't judge your eating habits; it simply transmits your input. Keeping it pristine is a form of respect for the hours of your life that pass over its keys.
So, the next time you sit down and feel the grittiness under your fingertips, remember the dark history embedded in those crevices—the crumbs of a thousand sandwiches, the dust of a thousand late nights. Then, take a deep breath, gather your tools, and embrace the grime. In cleaning your BlackWidow, you are not just maintaining a product; you are honoring the warrior who wields it. And when you hear that perfect, clean clack of the keys once more, you’ll know you’ve reclaimed your throne.


:max_bytes(150000):strip_icc()/005_clean-a-mechanical-keyboard-5184956-e5882697b74745a5b718e8304ac9c911.jpg)