How To Do Business Cards On Cricut
Okay, let’s be real for a second. You’ve watched the Cricut infomercials, seen the flawless Pinterest boards, and thought, “I could totally do that.” And you’re right! But then you think, “Business cards? Those are so tiny and precise.” Fear not, my crafty friend, because we’re about to turn your anxiety into a pile of perfectly cut, super-impressive little rectangles.
Forget printing at Staples like a mere mortal. We’re going to craft those bad boys. This guide is your backstage pass to making business cards that feel less like paper and more like a tiny, tangible hug for your brand. So grab your mat, your weeding tool, and a snack – because we’re about to get our DIY on.
Step 1: Gather Your (Not So) Secret Weapons
First, you need the right stuff. You can’t just use regular printer paper, unless you want your card to have the structural integrity of a napkin. You’ll need cardstock – and not the flimsy kind. Look for something around 80lb or 110lb for that premium, “I-totally-have-my-life-together” feel.
Must Read
You’ll also need a StandardGrip Mat (the green one, unless you’re living dangerously) and a weeding tool. Oh, and don’t forget your Cricut! The Maker, Explore, or Joy will work – they all have a “card” setting that’s basically magic. Just remember: your Cricut is a tool, not a pet, so don’t try to feed it the cardstock before you’re ready.
Step 2: Design Like a Boss (But Keep it Simple)
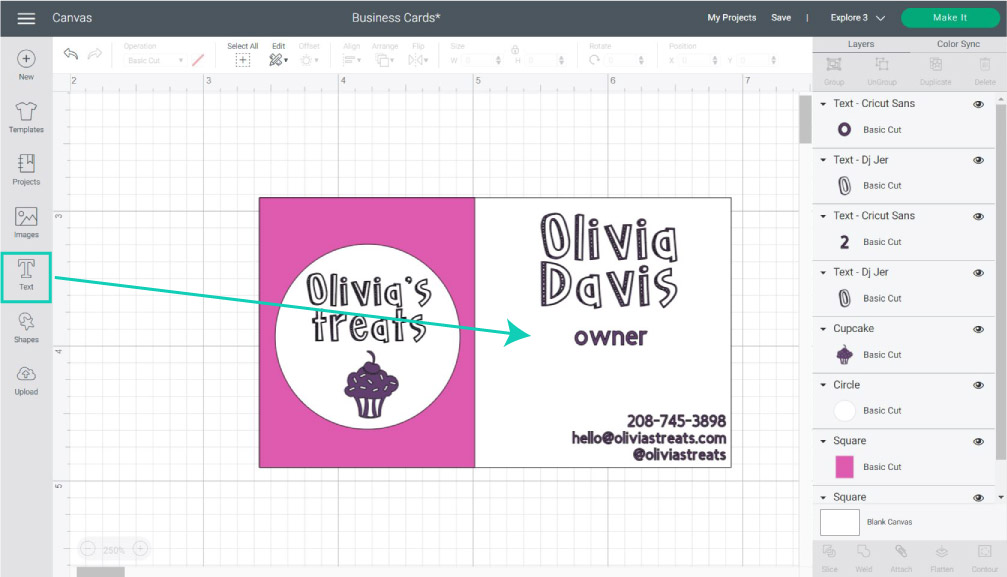
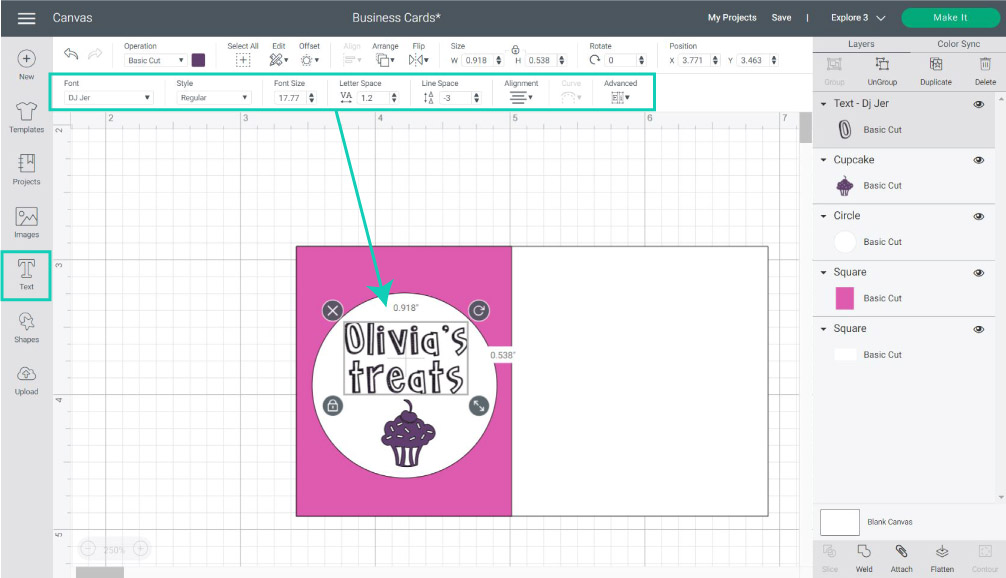
Now, open up Cricut Design Space. You can use the pre-made templates, but honestly, they look like they were designed by a robot who’s never seen a font before. Make your own! Create a 3.5” x 2” rectangle – that’s the standard business card size, and it fits perfectly in wallets, which, fun fact, is where they live.

Here’s the pro-tip: Do NOT design your card to be one solid block of text. That’s a rookie move. You want to use the draw function for your name or logo, and cut for the shape. Or, go wild and use foil! The point is, think about the layers. If you have a solid background, you’ll waste a ton of cardstock. Instead, cut out individual shapes or text that sit on top of a base card.
And for the love of all that is holy, double-check your spelling. There’s nothing worse than handing out 50 cards with a typo in your email. That’s not “artisanal,” that’s just embarrassing.
Cutting Without the Crying
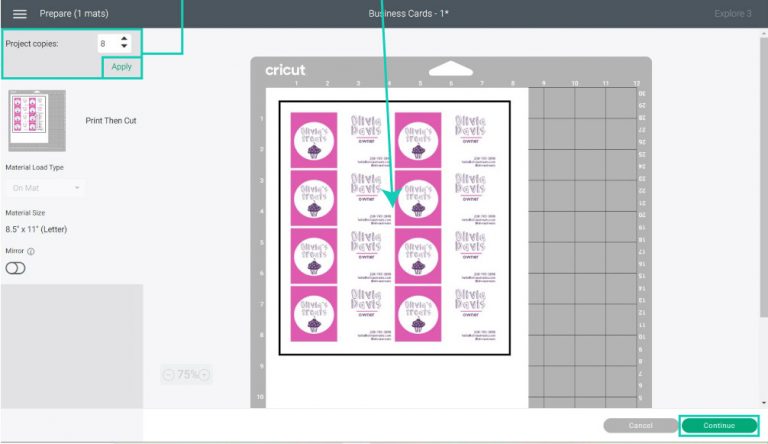
Load your cardstock onto the green mat. Make sure it’s really stuck down – use a brayer or just press hard with your hands. If it peels up, your card will shimmy during the cut, and you’ll get a wavy mess that looks like a sad accordion. Set your material to “Cardstock (80lb)” or “Heavy Cardstock” and press that blinking Go button.
Watch it do its little dance. It’s mesmerizing, right? Wait until it’s completely finished, don’t just yank the mat out while it’s mid-slice. That’s how accidents happen. Patience, young grasshopper. Once it’s done, flip the mat over and peel the mat away from the paper, not the paper from the mat. This little trick saves you from bending your precious cards.
Step 3: Weeding is Weirdly Satisfying
Now for the part everyone loves to hate: weeding. If you’ve made a design with small text, you’ll be pulling out tiny pieces of paper with tweezers, wondering why you didn’t just go digital. But trust me, when you finally pull out that perfect letter “e” without ripping it, you feel like a surgical master. It’s like a video game but with more paper cuts.
Use your weeding hook to gently lift the negative pieces away. Don’t rush this. It’s a meditation. Take a sip of your coffee, curse softly under your breath, and keep going. The result will be worth it.

Step 4: The “Oops, Let’s Fix This” Stage
If your text looks a little thin, or you accidentally cut through the “o” in your logo, don’t panic. That’s not a mistake; that’s a design choice. Or, you know, a learning opportunity. You can always re-print, but sometimes those tiny imperfections make them look hand-made. People love that stuff.
Another hack: if your cardstock is too heavy for a clean cut, try setting it to “Basswood” or “Poster Board” – just with a lower pressure amount. Yes, you’re lying to the machine, but it’s a white lie. It’s for the good of the design, so it’s okay.
Finishing Touches (That Make You Look Fancy)
Once all your cards are cut and weeded, examine them. You can use a corner rounder to soften the edges, or better yet, leave them sharp. Sharp edges scream “modern, edgy start-up.” Rounded corners scream “I have my life together and I do yoga.” Your choice.

To make them pop, use a foil pen to add a metallic border, or write a little handwritten note on the back of each one. People remember that! It’s like a tiny, personal tattoo, but for your business.
You Did It! Now Go Network!
Look at you, a crafting champion, a paper sorcerer. You’ve just made a stack of business cards that are 100% you. They’re not perfect, they might be slightly crooked, but they have soul. And nobody can say that about a Kinkos copy.
So go forth, hand them out like confetti at a parade. Be proud of every little cut and every weed. You didn’t just make paper rectangles; you made a tiny piece of your future. And if anyone asks where you got them, just smile and say, “Oh, a little birdie named Cricut told me.” Then wink. They’ll have no idea what’s happening, but they’ll be impressed anyway. Now go make something amazing.