
How Do You Add A Printer To Your Laptop

So, you've got a shiny new laptop and you're ready to get to work, but there's just one problem: you need to add a printer to the mix. Don't worry, it's easier than you think - no technical genius required! Just follow along and we'll have you printing like a pro in no time.
Step 1: Make Sure Your Printer is Ready to Go
First things first, you'll need to unpack and turn on your printer, if you haven't already. This might seem obvious, but trust us, it's an easy step to forget. Take a minute to read the manual and get familiar with your printer's settings.Next, you'll need to connect your printer to your laptop, and there are a few ways to do this. You can use a USB cable, which is the simplest way to get started, or you can go wireless and connect via Wi-Fi or Bluetooth. Just make sure your laptop and printer are on the same network and you're good to go!
Must Read
The Fun Part: Installing the Printer Software
Now it's time to install the printer software on your laptop, which is usually a pretty straightforward process. Just pop in the installation CD or download the software from the manufacturer's website, and follow the on-screen instructions. Don't worry if you encounter any technical jargon along the way - just take a deep breath and remember, you've got this!
Adding the Printer to Your Laptop
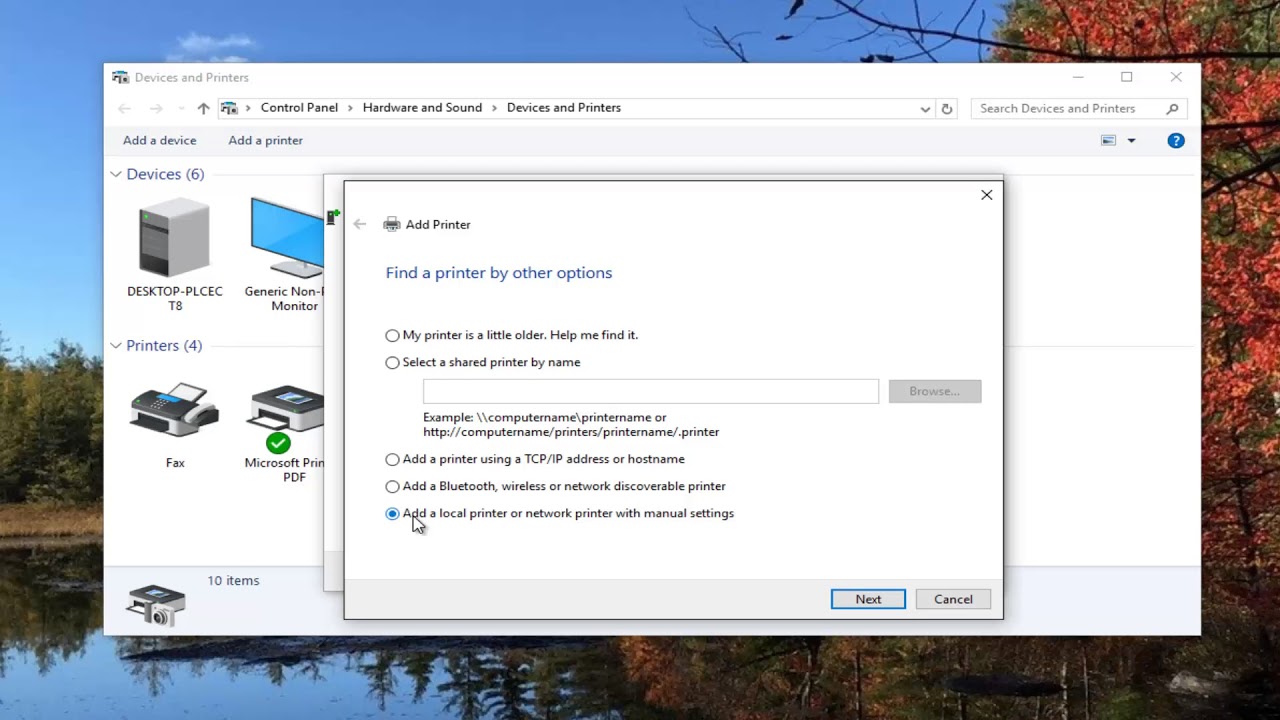
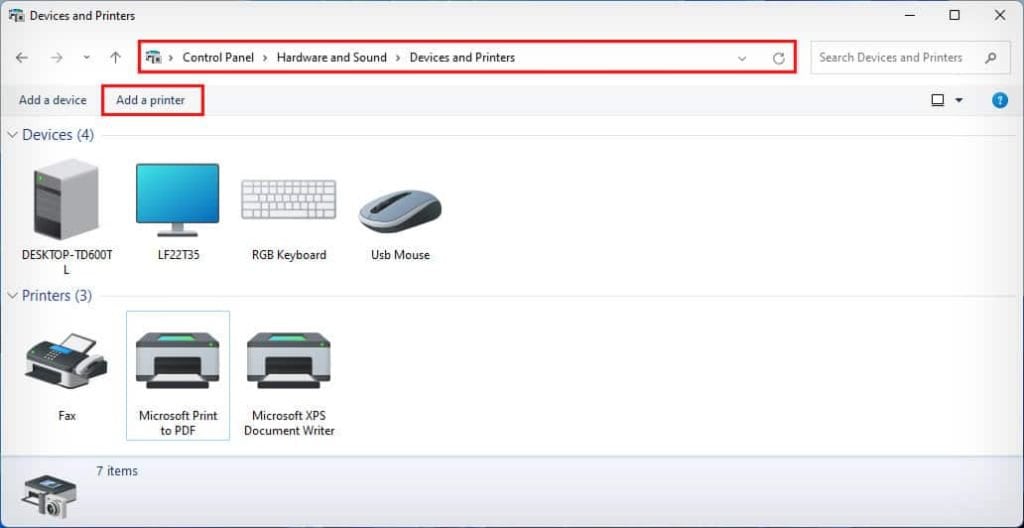
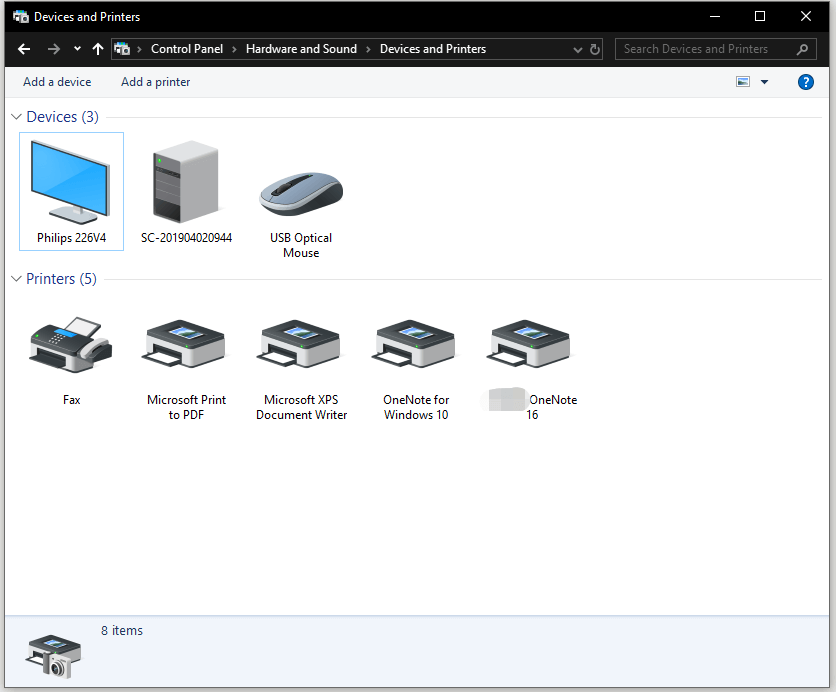
With the software installed, it's time to add the printer to your laptop. On a Windows laptop, you can do this by going to Devices and Printers and clicking on Add a printer. On a Mac, it's just as easy - simply go to System Preferences and click on Printers and Scanners.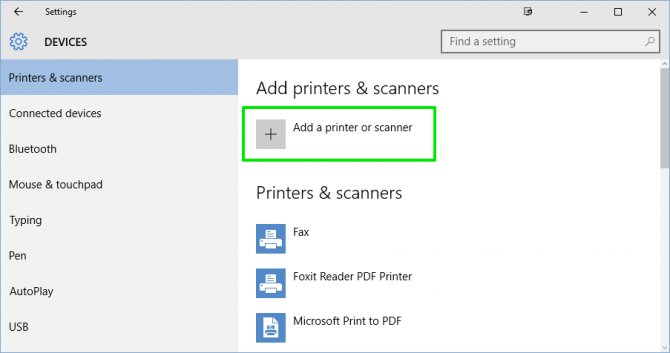
Once you've added the printer, you'll need to choose the right driver to ensure everything runs smoothly. Don't worry if this sounds like tech speak - just select the driver that matches your printer model and you're all set. And if you're still having trouble, you can always contact the manufacturer's support team for a little extra help.
Now that you've added your printer, it's time to test it out! Print out a test page or a fun photo to make sure everything is working as it should. And if it's not, don't panic - just go back through the steps and troubleshoot until you get it just right.
Troubleshooting Tips and Tricks
So, what if things don't go according to plan? Don't worry, it's not the end of the world! If you're having trouble getting your printer to work, try restarting your laptop and printer and see if that does the trick. You can also try updating your printer drivers or checking for any software updates to ensure you've got the latest and greatest.
The Final Countdown: You're Ready to Print!
And there you have it - you've successfully added a printer to your laptop! It might have seemed like a daunting task at first, but with these easy-peasy steps, you're now a printing pro. So go ahead, print out that report, photo, or recipe - you've earned it!In conclusion, adding a printer to your laptop is a breeze, and with these simple steps, you'll be printing like a pro in no time. So don't be afraid to get creative and make some beautiful prints - your laptop and printer are now best friends! And remember, if you ever need any help along the way, just google it or ask a friend for a little assistance. Happy printing, and don't forget to smile - you're now a part of the printing elite!
:max_bytes(150000):strip_icc()/004_how-to-connect-a-printer-to-a-laptop-4588717-5c8026acc9e77c0001fd5b15-9c7f943a1823461b9a02428ef1cced2d.jpg)
:max_bytes(150000):strip_icc()/Donotshareannotated-4846d7563c924ae0a0bd31a0b7bfecb7.jpg)

