How Can I Slow Down A Time Lapse

There is a peculiar magic in the act of taking something incredibly fast and forcing it to breathe. We live in an age of acceleration—scrolling reels at 2x speed, binge-watching entire seasons in a single sitting, and compressing our own lives into highlight reels for social consumption. The time-lapse is the perfect metaphor for this era: it condenses hours into seconds, turning the mundane into the monumental. Yet, hidden within the creative suite of nearly every modern camera and smartphone is the inverse function, a quiet rebellion against the rush. Slowing down a time-lapse isn't just a technical adjustment; it’s a philosophical shift, a decision to demand that the universe reveal its secrets at a pace we can actually digest. It is the art of stretching a single moment until it becomes a vast, cinematic landscape.
Historically, the time-lapse was born from scientific necessity—Eadweard Muybridge’s sequential photography of a galloping horse in 1878 wasn't art; it was data. By the mid-20th century, it became a tool for botanists and urban planners to observe growth and decay. But in the last decade, with the rise of high-resolution sensors and computational photography, the time-lapse has become a democratized language. The "slow-down" function, however, is often overlooked. We don't typically think of slowing down a fast thing; we think of speeding up a slow thing. Yet, when you interpolate frames or adjust the playback rate, you enter a liminal zone—a hyperreal space where clouds don't rush but drift, where stars don't streak but pulse. This is not merely a slower video; this is a meditative recalibration of your perception of reality itself.
The Physics of Perception: Why Speed is a Lie
To understand how to slow down a time-lapse, you must first understand the fundamental lie of temporal compression. A standard time-lapse captures a frame every 2 to 10 seconds, then plays them back at 24 or 30 frames per second. This creates a "rush" of motion that our brains interpret as a rapid flow of time. When you slow this down—whether by increasing your capture interval (taking a frame every 30 seconds instead of 5) or by using optical flow interpolation in post-production—you are fundamentally altering the data density. The kicker is that most people think slowing down means simply dragging the clip to a lower speed in their editor. This is a rookie mistake. Dragging the clip to 50% speed in a 24fps timeline will result in choppy, stuttering motion because you have no extra frames to fill the gaps. The secret lies in frame generation or, conversely, in capture strategy.
Must Read
Psychologically, our brains are wired to detect motion as a survival mechanism. Rapid motion triggers the amygdala—fear, alertness. Slow motion, on the other hand, triggers the default mode network, associated with introspection and awe. When you watch a time-lapse of a city at 1000x speed, you feel the frantic energy of humanity. But when you slow it down to 100x speed, the same footage becomes a languid ballet of headlights; the city appears to be breathing, not screaming. This is why filmmakers use slow-motion for emotional climaxes—it forces the audience to sit in the feeling. Applying this to a time-lapse is not just a technical choice; it is a narrative choice about how you want your audience to feel about time itself. There is a dark fun fact here: when you slow down a time-lapse of decaying fruit, the visual atrocity of mold spreading becomes a beautiful, almost floral expansion. The horror is hidden in the speed; the beauty is revealed in the patience.
Culturally, the "slow down" function is a direct counterpoint to the "fast-forward" culture of TikTok and YouTube Shorts. We are conditioned to think that content must be immediately consumable, that a 10-second clip is the optimal attention span. By slowing a time-lapse down, you are committing a subversive act of digital rebellion. You are asking your viewer to invest 60 seconds into watching a 10-second event. This is why sites like Vimeo and art-house cinema utilize this technique profoundly differently than Instagram. On Instagram, a slowed-down time-lapse is often mistaken for a technical error (why is this so boring?). In a gallery setting, the same footage is considered profound. The key to mastering this is understanding your medium and your audience's patience threshold. You are not just changing the speed; you are changing the social contract of viewing.
The Craft of Delay: Practical Techniques and Case Studies
Let’s get technical for a moment, because the practical application is where most people fail. There are three primary methods to slow down a time-lapse, and each yields a distinct aesthetic. Method One: The Capture Interval Adjustment. This is the "do it right at the source" approach. If you want a slower end result, you don't slow down the playback; you extend the time between captures. For example, a standard cloud time-lapse might take a frame every 2 seconds. To slow it down dramatically, you take a frame every 15 seconds. The result is a time-lapse where the clouds appear to be moving like glacial ice—majestic, heavy, and unstoppable. The downside? You need more real-world time to gather the same number of frames. A 10-second clip at 2-second intervals takes 80 seconds of real time. A 10-second clip at 15-second intervals takes 600 seconds (10 minutes). This is the "slow living" approach to cinematography.

Method Two: Post-Production Optical Flow. This is the digital magician's trick. Software like DaVinci Resolve, After Effects, or even modern iMovie uses optical flow algorithms to analyze the direction of pixels and synthesize new frames between existing ones. You take a perfectly normal 30fps time-lapse, slow it down to 30% speed, and the software invents new frames to create buttery-smooth motion. The caveat is that this can produce "ghosting" artifacts, especially on complex geometry like tree branches or crowd movements. A case study: Independent filmmaker Sofia Reyes used this technique on a street market time-lapse in Mexico City. At normal 2000x speed, the market was a blur of chaotic activity. After running it through optical flow at 0.25x speed, the individual faces became distinguishable, the vendor's hand gestures became visible, and the dust particles in the air hung like cosmic nebulas. The chaos transformed into a choreographed dance. Method Three: The Hybrid Approach. This involves aggressive frame interpolation combined with a lower initial playback rate. This is often used in high-end commercials to create a "living diorama" effect—static subjects with hyper-slow ambient movement in the background.
For the actionable takeaway, consider the scenario of a traffic jam. A standard time-lapse of an intersection shows cars zooming by stressfully. A slowed-down time-lapse (using a 10-second interval and then slowed to 50% in post) shows the cars as separate entities, almost like blood cells navigating a vein. The red tail lights become a viscous fluid. The lesson here is about attention. When you slow down a time-lapse, you force the viewer to notice the micro-interactions: the pedestrian who hesitates before crossing, the flicker of a neon sign, the subtle sway of a flag. This is the difference between seeing a crowd and seeing individuals. For your next project, try this: shoot a busy park bench for 30 minutes at a 5-second interval. Then, in editing, slow the clip down to 20% speed using optical flow. The birds that appeared as darting specks will now glide; the leaves falling will spiral gracefully. This is the "Grain of Sand" effect—finding the entire universe in a tiny patch of reality.
There is also a practical pitfall to avoid: the "soggy" look. If you slow down a time-lapse too much without adding motion blur, the footage can feel dead and artificial. Real life has a constant, imperceptible micro-blur. To fix this, you can add a subtle radial or linear blur in post, or you can apply a slight sharpening mask to the moving elements. Professionals often use a technique called "Twixtor" or "FlowMotion" which are specialized plugins for extreme slow-motion time-lapses. These plugins map the vector paths of moving objects and can create a fluidity that feels almost supernatural. The dark secret of these tools is that they can be computationally intensive—a 20-second clip might take 10 minutes to render. But the result is footage that looks like it was shot on a budget of a million dollars, with a camera traveling through time itself.
Frequently Asked Questions: The Nitty-Gritty of Slowing Down
1. What is the ideal frame rate to output a slowed-down time-lapse?
The ideal output frame rate is dependent on the delivery medium, but for a truly hyper-smooth slowdown, you want to render at 60 frames per second (fps). Here’s why: when you slow a clip down, the temporal information is spread across more frames. If you output at 24fps, your motion blur and interpolation might look choppy on fast pans. At 60fps, the slowed time-lapse has enough temporal resolution to hide the interpolation artifacts. Think of it this way: you are giving the video more "time slots" to display the tiny movements.

However, if you are posting to social media, many platforms will compress 60fps to 30fps. To combat this, you must apply a gentle motion blur effect before you slow the clip down. If you don't, the compression will cause strobing. The rule of thumb is: capture at the highest interval you can (longer intervals mean more distinct movements), then slow down in post, then render at 60fps, then let the platform convert it. The extra frames from your render will survive the compression better than native 30fps footage.
2. Can I slow down a time-lapse without professional software?
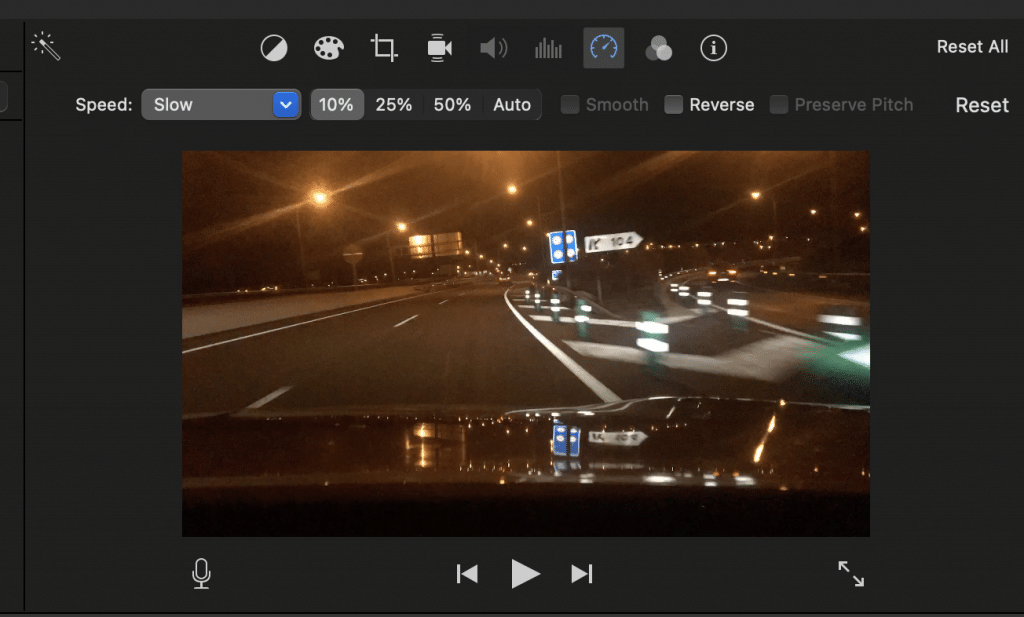
Yes, absolutely. Modern smartphones have this built into their native editing suites. Apple's iMovie and Google Photos offer a "speed" slider, and while they don't perform advanced optical flow, they do a decent job of frame duplication, which results in a slightly "stop-motion" feel. This is actually a sought-after aesthetic—it gives the footage a tactile, handcrafted quality, reminiscent of early cinema. The lack of smoothness becomes a stylistic choice rather than a flaw.
For a more seamless result without professional plugins, use DaVinci Resolve (which is free) and use the "Optical Flow" setting in the clip attributes. It requires a bit of learning, but it's the most accessible high-end tool. Alternatively, you can use a technique called "Frame Blending" in Adobe Premiere Pro's Speed/Duration settings. This takes an average of the adjacent frames, creating a ghosting blur that, while not as crisp as optical flow, is very forgiving for clouds and water.
3. Why does my slowed-down time-lapse look "ghosty" or like plastic?
The "ghosty" look is a classic sign of optical flow algorithm failure. When the algorithm cannot accurately track the direction of pixels (due to overlapping objects, fine textures like hair, or complex repetitive patterns like a crowd), it "imagines" frames that don't align perfectly with the source, resulting in translucent echoes of objects. This is especially prevalent in time-lapses with foreground and background movement moving at different speeds (parallax).
To mitigate this, you have two choices. First, switch to "Frame Blend" or "Frame Duplication" mode—it won't be smooth, but it will be visually clean. Second, and more advanced, is to isolate the layers in your editing software. Slow down the background (the sky, the distant city) with optical flow, and keep the foreground (the moving person, the car) at a different, slightly faster speed, then composite them. This mimics how the human eye works—we naturally focus on one layer at a time.
4. Does shooting at a higher resolution (4K/8K) help when slowing down?
Shooting in 4K is a god-send for slowed-down time-lapses, but not for the reason you might think. The resolution doesn't add temporal data (frames), but it adds spatial data for the software to work with. When you slow down a 4K clip and scale it down to 1080p, the algorithm has four times the pixel information to track the movement vectors. This dramatically increases the accuracy of the optical flow interpolation, resulting in fewer artifacts.
Furthermore, shooting in 4K allows you to do a "punch-in" or a slow digital zoom on the time-lapse without losing quality. You can simulate a dolly move on a stationary subject, which adds a sense of depth and reduces the monotony of the slowed motion. The advice here is simple: if you plan to slow down your footage, always shoot in the highest resolution your camera allows. The extra data is cheap insurance against ugly artifacts.
5. How do I set the initial capture interval for a "slow" time-lapse?
It depends entirely on the speed of the subject. For a slow time-lapse of moving clouds, if you want them to appear as gentle, sweeping curves rather than frantic rushing, you need a longer interval. A good baseline: for clouds, use a 5 to 10-second interval. For stars (fixed on the sky), you need a 20 to 30-second interval. For crowds, a 2 to 3-second interval is often enough, but slowing them down in post will make them look like drifting sediment.

The golden formula is: Desired Duration of final clip (seconds) x Playback Frame Rate (24) x Interval (seconds) = Total real-time shooting duration. If you want a 10-second clip at 24fps, and you shoot at a 10-second interval, you need 240 frames, which is 2400 seconds (40 minutes) of real time. This seems long, but it produces that majestic, slow, "breathing" motion that is impossible to achieve in post-production alone. The longer the interval, the more "jump" between frames, but the smoother the optical flow can be if used correctly.
The Beauty of the Long Take in a Short-Term World
In our daily lives, we are constantly bombarded with urgency. Notifications, deadlines, and the pressure to be productive every second. Slowing down a time-lapse is a reminder that time is not a resource to be saved, but a canvas to be stretched. When you spend forty minutes capturing a sunset and then stretch those minutes into a 30-second clip that feels like a minute, you are actively resisting the tyranny of the instant. You are telling the world, "I see the nuance." This practice seeps into your everyday perception. After editing a slow time-lapse, you might find yourself staring out a window longer, noticing the tiny incremental changes in light that usually go unnoticed.
Furthermore, this technique connects us to a deep human tradition of storytelling. Before the modern era, time was marked by the seasons, by the slow arc of the sun. Our ancestors understood a pace of life that we have largely forgotten. A slowed-down time-lapse bridges that ancestral perception with modern technology. It allows us to see the algae grow, the frost creep, the shadows lengthen—phenomena that are invisible to the naked eye at normal speed but are fundamental to our existence. It is a humbling experience to watch a building's shadow consume a park over the course of an hour, distilled into ten graceful seconds.
Ultimately, mastering the slow-down is mastering patience. It is a deliberate act of rebellion against the god of speed who rules our feeds and our hearts. The next time you have a clip of a bustling street, don't just speed it up to show the chaos. Slow it down until the chaos becomes order, and the noise becomes a symphony. You might just find that the answer to the frantic pace of life isn't to rush more, but to watch with enough attention that time itself seems to bend to your will. Look closely, and the world reveals its most profound secrets not in a flash, but in a long, steady exhale.